Raspberry Pi-based Home Assistant Control Panel

This is my take on a Home Assistant control panel platform. It's based on this guide to creating a Raspberry Pi minimal browser kiosk but with wake-on-motion and some tweaks to improve the experience. Background info, why I chose this over the other options, and plans for future expansion are at the bottom, for anyone interested. My plan is to install one in each room with room-specific widgets.
Hardware
- RaspberryPi 3 B
- 8GB or larger high quality microSD
- Official Rpi 7" touchscreen
- Official Rpi camera v2
- Smartipi touch2 case with camera mount
- USB keyboard for initial HA login
Raspbian lite setup
- Image Raspbian Lite to the SD using the imaging tool or other method.
- Create an empty file on the SD boot directory named ssh to enable SSH on boot.
- Create a file in the SD boot directory named wpa_supplicant.conf with the following content, replacing the variables with your details of course.
Note: Country code is required. This file must use Unix LF line endings, not CRLF endings.
ctrl_interface=DIR=/var/run/wpa_supplicant GROUP=netdev
update_config=1
country=<Insert 2 letter ISO 3166-1 country code here>

network={
 ssid="<Name of your wireless LAN>"
 psk="<Password for your wireless LAN>"
}- Insert the microSD and boot the RPi. WiFi should have connected automatically.
- Connect via SSH using the default username pi and password raspberry
- Run sudo raspi-config to set the following
- Change default password
- Select “Desktop / CLI” and then “Console Autologin”
- Update Raspbian by running the following.
sudo apt-get update; sudo apt-get -y upgrade; sudo reboot
Minimal Chromium install
sudo apt-get install --no-install-recommends xserver-xorg x11-xserver-utils xinit openbox chromium-browser vimMotion install
wget https://github.com/Motion-Project/motion/releases/download/release-4.3.2/pi_buster_motion_4.3.2-1_armhf.deb
dpkg -i pi_buster_motion_4.3.2-1_armhf.deb# Find and change these lines
log_level 1
; videodevice /dev/video0 # comment this line out
mmalcam_name vc.ril.camera
mmalcam_control_params -rot 90
# Low res and framerate reduces motion CPU usage
width 320
height 240
framerate 5
# Add these lines
on_motion_detected DISPLAY=:0 xset dpms force on
lightswitch_percent 90Startup scripts
[[ -z $DISPLAY && $XDG_VTNR -eq 1 ]] && startx -- -nocursor
## Allow quitting the X server with CTRL-ATL-Backspace
setxkbmap -option terminate:ctrl_alt_bksp

## Set screen sleep to 300s (5min)
xset s 300

## Add user "motion" to xhost in order to wake screen
xhost +si:localuser:motion

## Start Chromium with flags
chromium-browser https://your home assistant dashboard \
  --window-size=800,480 \
  --window-position=0,0 \
  --start-fullscreen \
  --kiosk \
  --disable-translate \
  --no-first-run \
  --fast \
  --fast-start \
  --disable-features=TranslateUI \
  --disk-cache-dir=/dev/null \
  --overscroll-history-navigation=0 \
  --disable-pinch \
  --noerrdialogs \
  --disable-infobars \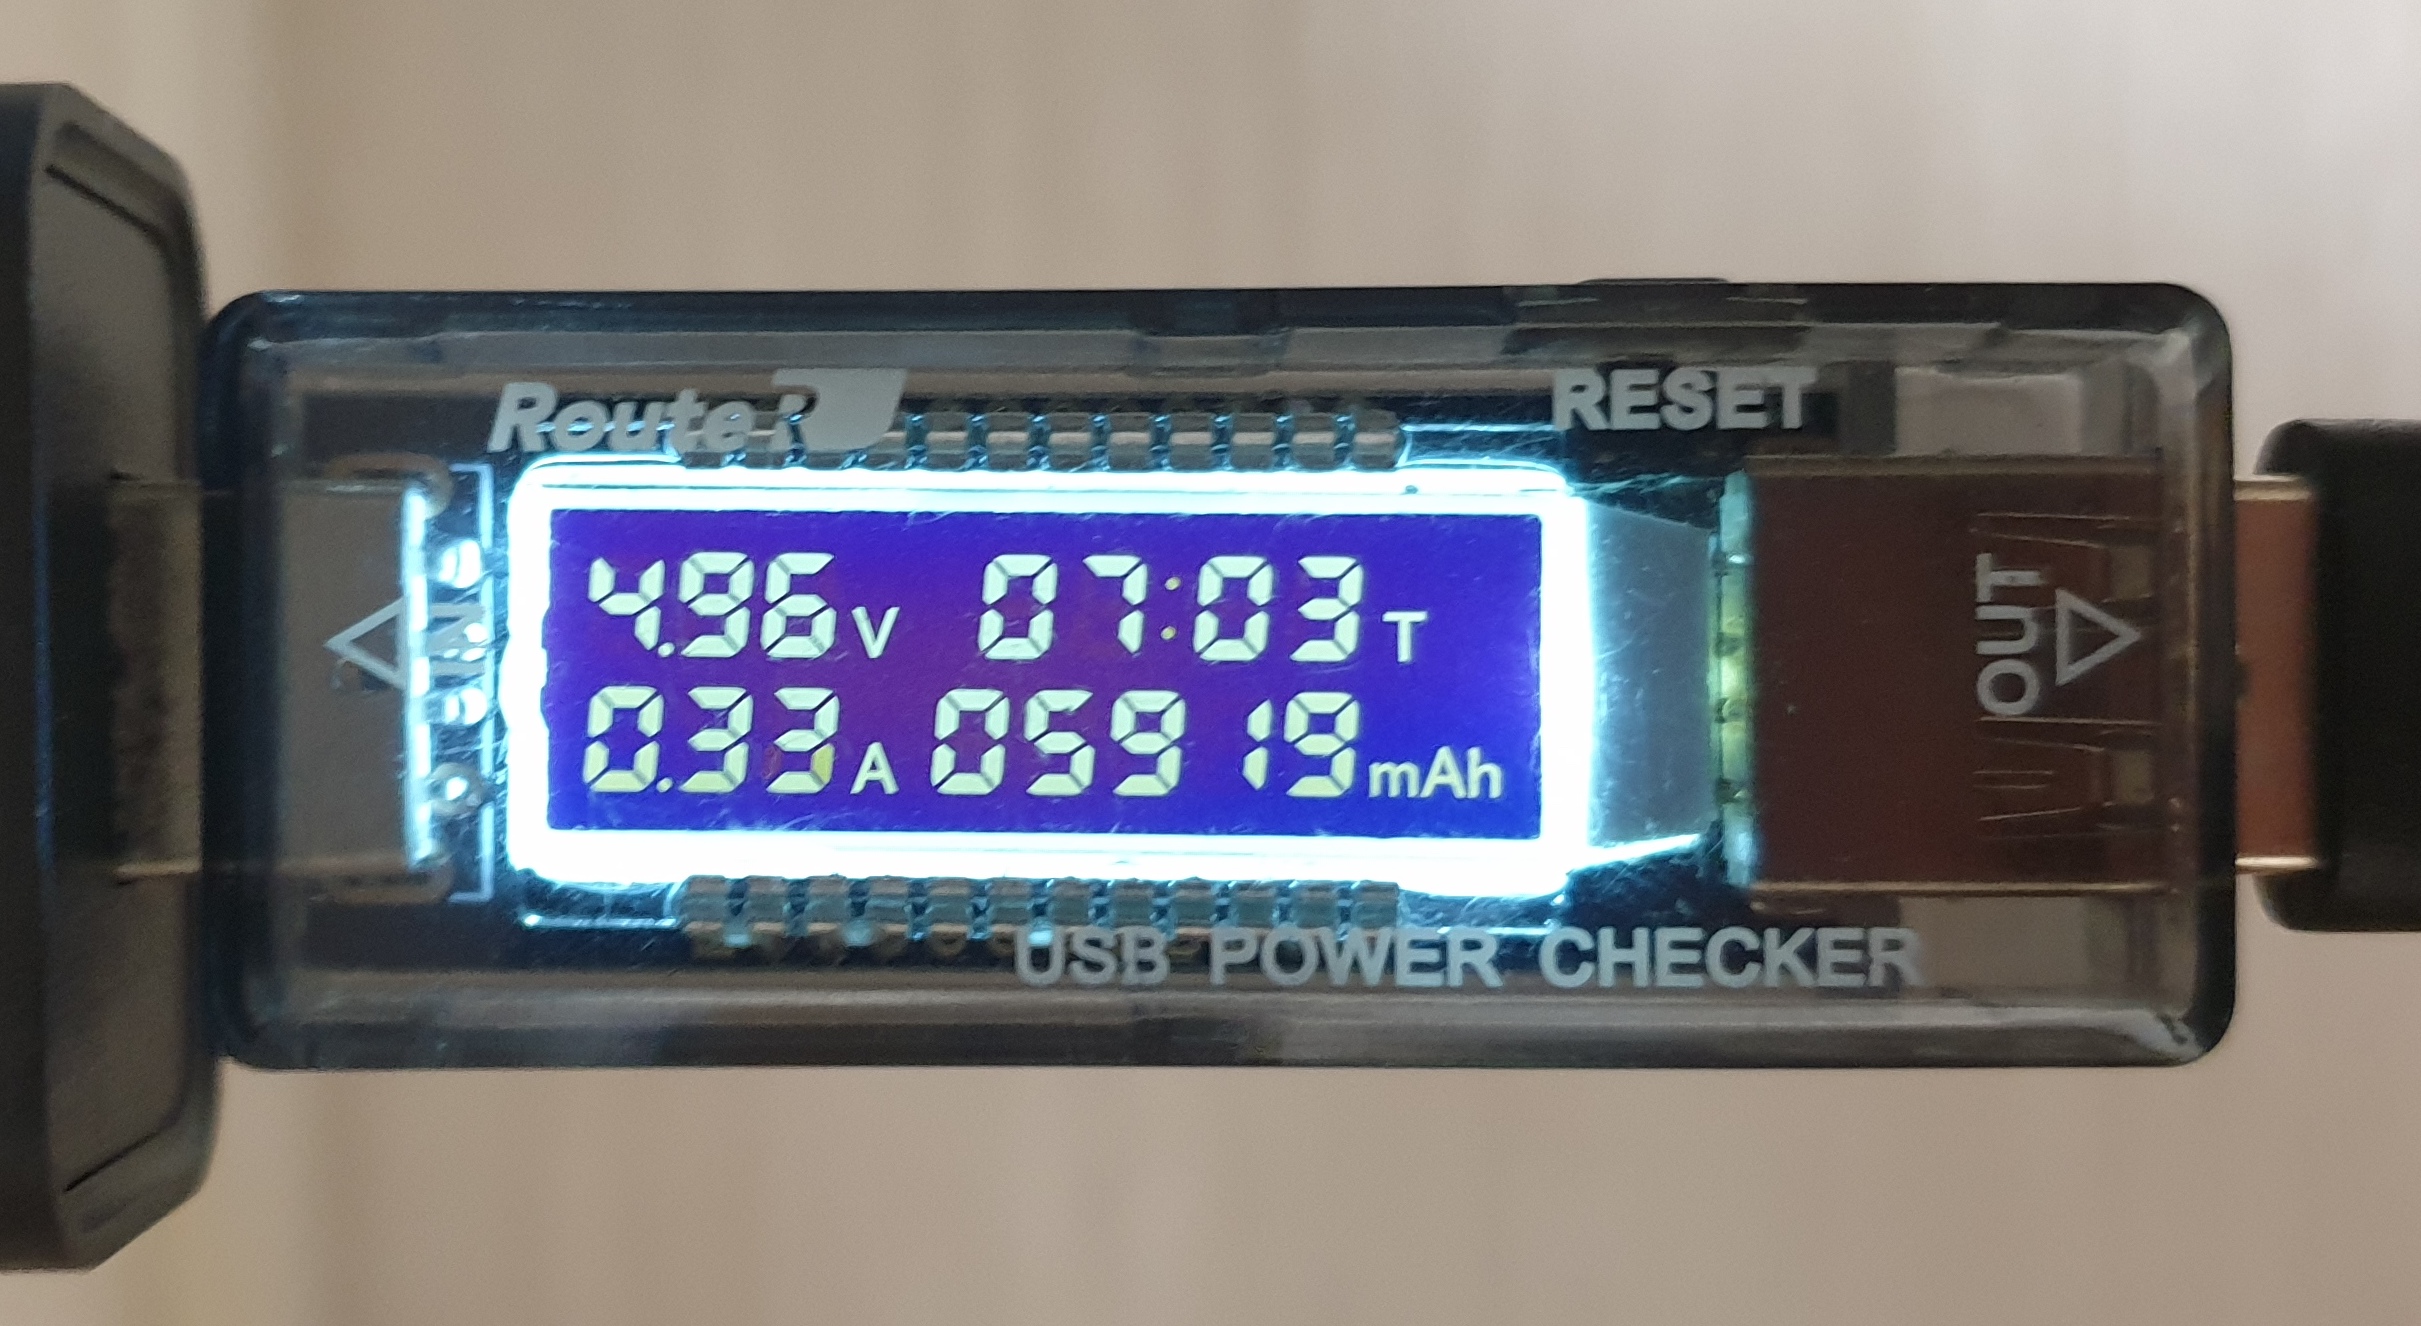
--pull-to-refresh=1 \sudo sh -c 'echo "75" > /sys/class/backlight/rpi_backlight/brightness' Power load

Background and alternatives considered
I have been using the Wallpanel Android app on an old Android tablet but prefer a battery-less solution to avoid the risk of spicy pillows. Most consumer tablets fail to boot with the battery removed but cable-powered alternatives are limited. LineageOS on RPi3 was laggy on the official RPi touchscreen due to the software swiftshader driver. An RPi4 or HDMI touchscreen should have fixed that but I couldn't find a clean enclosure for an HDMI touchscreen + Pi and wanted to keep the price low. I also considered one of the many AOSP cable-powered wall tablets on Alibaba but didn't have the confidence in the compatibility, security, and updates to take that risk.
The objective for this panel was to try to replicate the Wallpanel app but at a minimum should boot directly to the UI and support auto sleep & wake. This RPi solution meets those requirements but lacks additional features Wallpanel provides, like MQTT reporting and remote controls.
Future expansion
The next step is to try to add some features from Wallpanel through the use of an MQTT client. Ideally the client should be able to:
- Report motion detected
- Report RPi hardware health
- Refresh the browser window remotely
- Reboot the RPi remotely
Lastly, since the plan is to install one panel in each room, it would be great for them to also work as video intercoms either to specific panels, broadcast, or to mobile devices. This jitsi-meet system looks promising. There's even a Docker container that should be able to run on the HA server.


This comment has been removed by a blog administrator.
ReplyDeleteHello! I've followed your instructions and got it all working except for the wake on motion. I must be using a much newer version of Raspberry Pi OS, any suggestions?
ReplyDelete